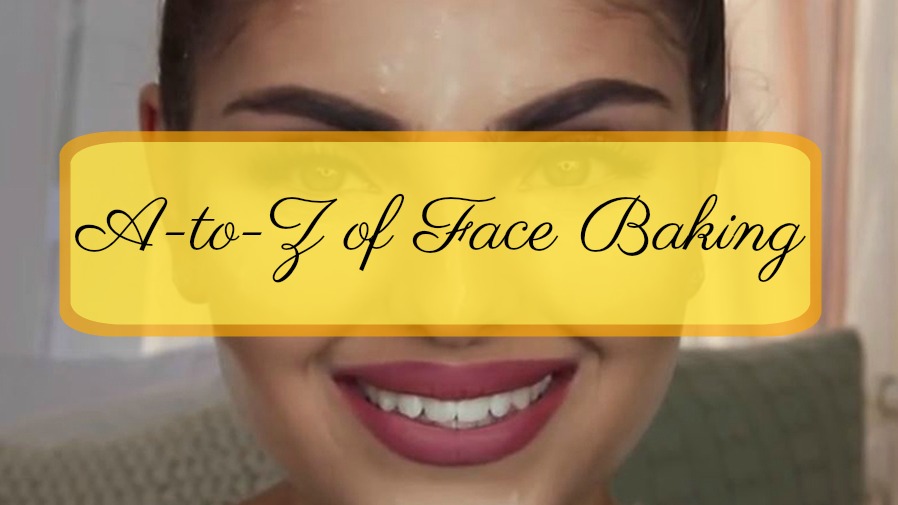
♥ Coming from a Combination Skin Girl’s Perspective ♥
Chiseled face is being the ‘Talk-of-the-Town’ these days. Contouring, Non-touring, Strobing, Baking… every one of these currently on trend facial makeup techniques revolve around sculpting the facial features to bring sharpness to the overall facial look. Most of these techniques require some skills and some basic ideas on the light-and-shadow perspective of various facial features while the rest are quite simple to follow. Today we are brainstorming on some basic what-why-how of a very easy facial feature enhancing makeup trend called Face Baking. This method has a number of advantageous sides for which it has become a personal favorite in a very short time span. Firstly, it requires only two ingredients and keeps my combination-to-oily face oil-free for 4-5 hours. Secondly, it brings out my facial features with least effort and lastly, baked face pictures really well. I am not that good with baking cakes but here is what I know about ‘Baking Faces’!
What is Face Baking?
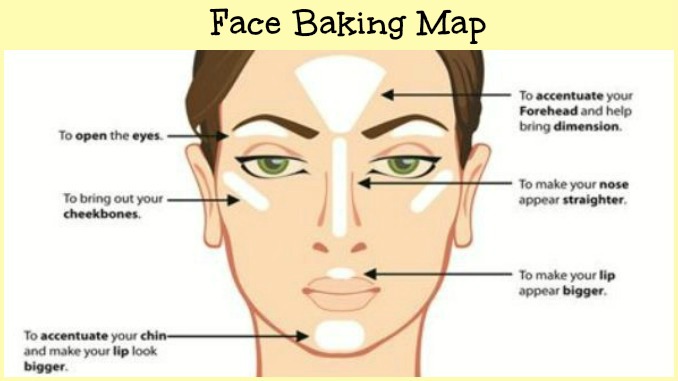
Face Baking, often referred as Face Cooking, is a technique of achieving an illusion of sculpted face by enhancing the high and low points with excessive application of setting powder. In Face Baking, a tinted base makeup product (a foundation, a concealer or at least a BB cream) is applied to the area of the face that catches light and loose powder is used in excess to set it. This way the warmth of the body helps the base makeup to melt and settle into the skin giving a flawless sharpness to the face where the low areas or the contours of the face are automatically accentuated.
Face Baking – Where did it come from?
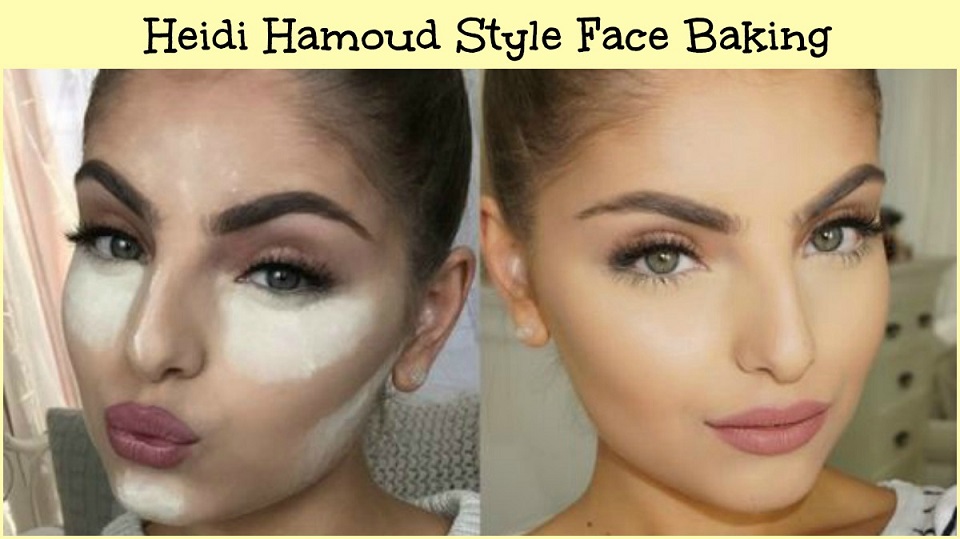
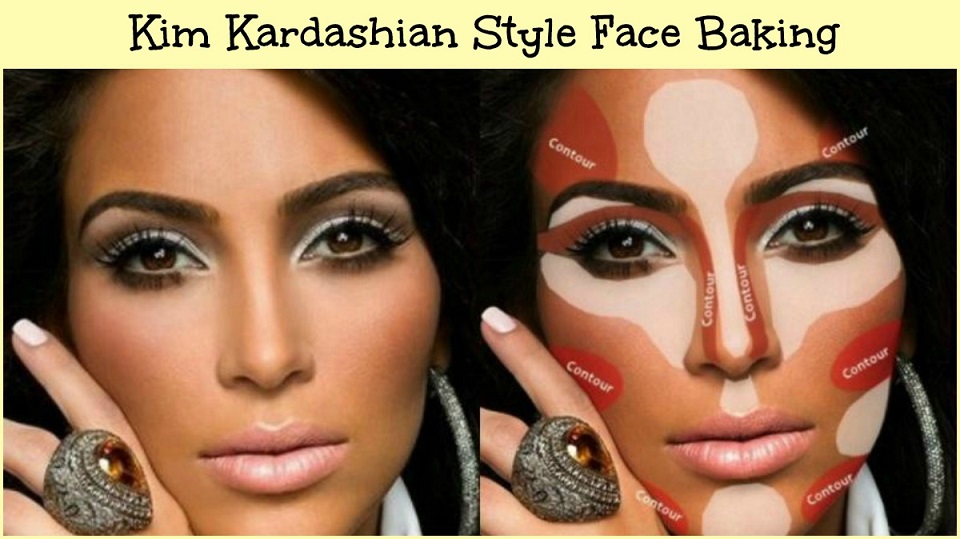
The concept of face baking is not that new. History says, this kind of powder based facial feature highlighting method was practiced in ancient Egyptian and European culture as a symbol of status. The Face Baking method is able to provide with creaseless makeup for considerable amount of time that is the reason this technique has been widely used by performing artists for whom frequent powder touch-ups are not possible. The recent craze about Face Baking is brought into the frame by famous Kim Kardashian and her make-up artist, Mario Dedivanovic. Till date a large number of beauty Youtubers have demonstrated their approach on Facial Cooking. Among them Huda Beauty and makeup artist Heidi Hamoud’s tutorial are my favorites.
Steps of Face Baking
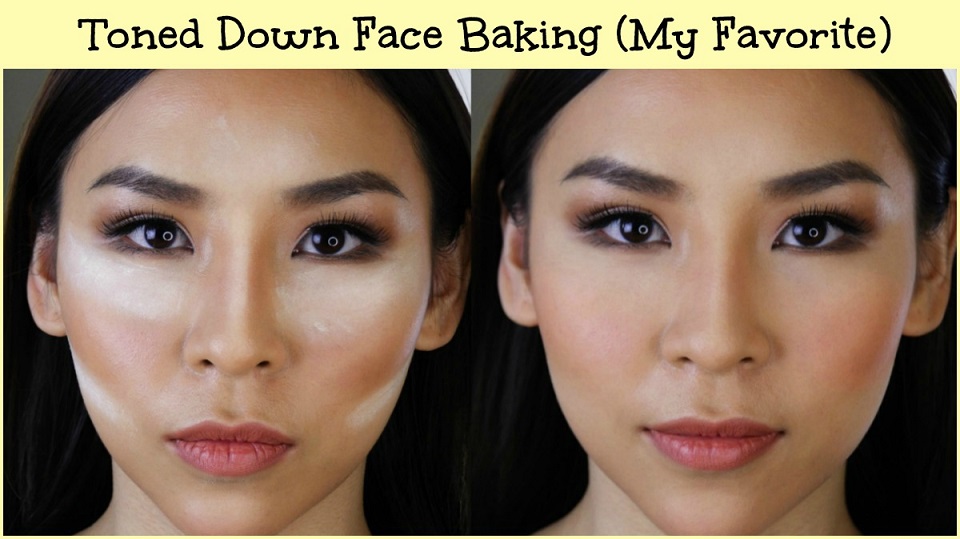
There is no certain rule to bake your face perfectly because techniques like these are often subjects to customization of the person’s choice who is opting for it. Due to this reason, there are gazillions of ways to bake the face are roaming around the web. Among all these variations of face baking there are some common tunes based on which I reached to my face baking goal. Here is what I do to get a natural looking (read not too dramatic!) baked face.
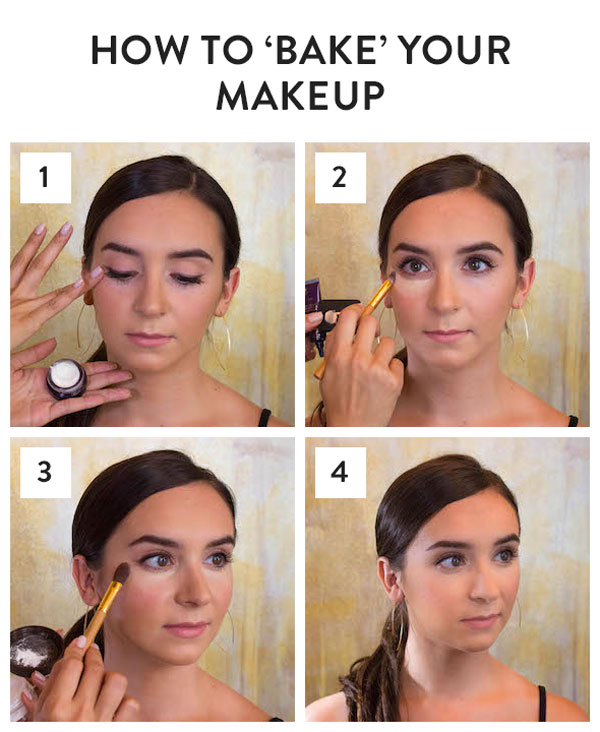
- I begin the makeup with freshly cleansed and moisturized skin. I like to put a good quality moisturizer under the eyes because this is the place I will be going over mostly. I have combination-to-oily skin so, I let the moisture seep into the skin for 5-10 minutes then blot off the excess.
- In the next step I apply foundation (when I want high coverage) or BB cream (for low coverage natural finish) all over the face. Then, I apply some more foundation, BB cream or a suitable highlighting concealer to the under eye area and blend with my wet makeup wedge.
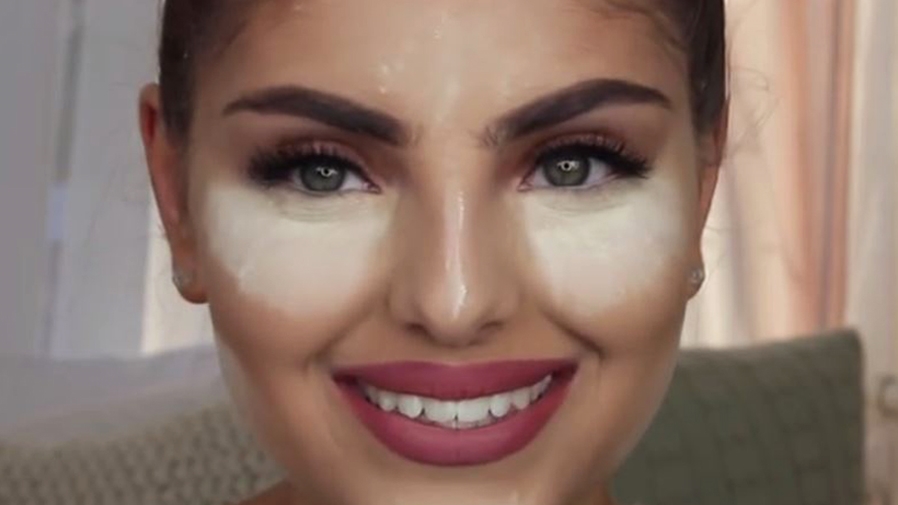
- The third step starts with setting the under eye with my all time favorite Lakme Rose Powder or any finely milled baby powder. I put some excess powder in my makeup wedge and apply it to the under eye area extending toward the apple of my cheek after that.
- Then I go over other high points of my face like the chin area, the ridge of the nose, the forehead and under the hollows of both the cheeks (as you see in the picture).
- I let it bake in the skin for good 15 minutes and then lightly dust off the excess with my powder brush.
Who Should & Who Shouldn’t Bake Their Faces?
Baking the face involves excessive use of translucent powder and as we know powders can be very drying to skin. Girls with oily skin will love this technique because it will prevent the face makeup getting all oily for a considerable amount of time. However, for the same reason people with dry skin may experience tautness to the skin which is not that good for skin. This technique is a strict no-no for those with wrinkles on their skin because this method may accentuate those fine lines.
Now, it’s the time to wrap up our discussion for the day. Hope these details of my approach towards Face Baking will help you in some way. Will be waiting to hear your point of views in the comments.
Love.
Post Author : Sreeparna
13 Comments
Eliza Thomas
There is another term for highlighting.. had no idea. Thanks for such cool posts Nisha.. love
Nisha Malik
Thanks Eliza…
Minakshi bajpai
Fabulous post.. Your tips for bake ur make up is quite informative.. Hope these tips will help us too..
Nisha Malik
I too hope so 🙂
Mrinal
Had no idea what this was.. thanks for sharing ?
Sreeparna Ganguly
Loved ti know it helped 🙂
Nisha Malik
Happy to help 🙂
Papri Ganguly
First of all Iovely article to read and very informative for those make up junkies. You know something I tried baking my face with baby powder and outcome looked super. Thanks for so detailed post.
Nisha Malik
Glad you liked it Papri 🙂
Sam Sheokand
woww I love this…..admire ur efforts…m definitely gonna try kim k contouring on myself
Nisha Malik
do let us know the result 🙂
Bushra Khan
This is useful information for makeup learners like me. Thanks for sharing!
Nisha Malik
Thank you for stopping by 🙂